Smart S1 2-wheel self-balancing scooter
Personal Transporter
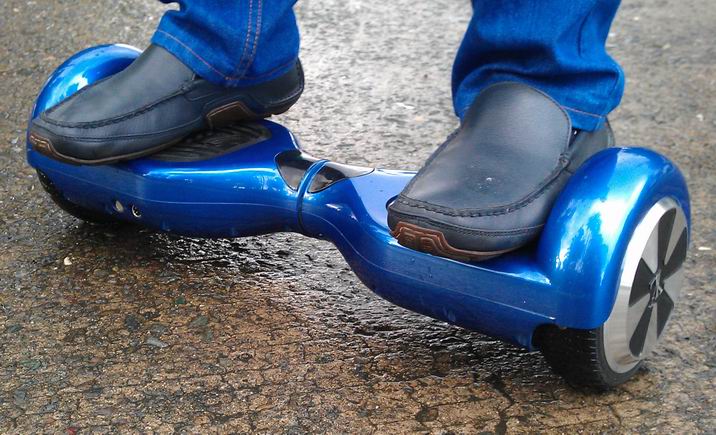


Though not an R/C unit, it shares some common points as far as the drive system is concerned – this personal transporter device is powered by two, independently-controlled BL (brushless) motors and runs on a lio-ion 36V DC battery/powerpack. So it deserves some documentation on quality, useability and first-hand overall observations on the unit.
The S1 personal transporter is a scaled-down version of the more popular Segway scooter, without the upright drivehandle, it has smaller wheels and is slower and lighter. Though weighing in at about 10kgs, its something still quite heavy to carry around for the average user.
It took me about 45 minutes to learn how to balance, get used to the control of speed, acceleration and of course the turning which is surprisingly intuitive to learn once you get to know the basic operation of the motors. So I think anybody who can stand upright and walk normally on their two legs can and will eventually learn how to use this device, its just a matter of time and if they have the assistance of an experienced user to coach them, it would be so much easier and safer. I’d suggest donning the usual protective wear/clothing as you would if you’re going out mountain biking, skateboarding, etc. and that means a helmet, elbow and knee crashpads and thick comfy clothing like jeans and long-sleeved shirt, gloves are also a must if you wish to protect your hands from scrapes and such when you fall down.
I could imagine that any sport or activity that requires balancing like skating, boarding (surf, skim, skate, etc.), cycling and the like would greatly help in learning to use this transporter. It has only two wheels so you need to balance on it constantly since there’s no third point to supprt and be lax, at first it seems to be so but as you get used to it, it becomes more natural and comes to the point that you’re not thinking about the balancing act anymore, kinda like learning how to ride the bicycle.
First time I stepped on the thing the wheel part where I put my foot on quickly rotated, unknowingly I had my foot slightly tilted (whether forward or backward I couldn’t remember), but the important thing was that you should step on one foot first and your step should be LEVEL! If you know this from the start then the wheels wont move, and if it doesn’t move then you’ll have an easier time to mount, otherwise you’ll end up like me mounting on jerkily since I was trying to compensate the movement of the wheels. And this awkward movement can lead to a slip and/or fall. Once you mount on one foot and making sure its level then mount with the second foot, and as with the the first, it should also be LEVEL! when you step on. The wheels are small enough that the center of gravity of the device (and you on it now) is low so balancing isn’t as difficualt as one can imagine, its akin to tiptoe-ing and it becomes second nature once you get the hang of it. Of course, having someone to hold on to (helping hang/arm) or even trekking poles, walking canes, etc. can help with those initial steps. REMEMBER, you’re feet should be LEVEL!
* 11/25/16 1026h – for reference, diagram for a single board 6.5″ unit.

Hi-res below…


On the third bronto pro, got lucky on this one 🙂
Running on Hobbywing EZRUN 10SL esc (60A?) with 3300kv (12T) motor.


*11/25/16 1011h – cleaned it off some dust, hopefully can test it out this afternoon, weather permitting.

All hub carriers are in violet alum metal. Also their respective part numbers from the catalogue.


Close-up.

Above trial with a Hobby king 2.4 radio.
Reference below for the BL ESC calibration…

Below is a handwritten rendition… 🙂 
Today I was able to calibrate the ESC of bronto no.2 (with the 5.5T BL motor) according to the instructions above. It was successful!

The set button is the tiny red button on the lower right and the power button is the slide switch at the left middle portion of the photo.Below is another view of the ESC.

Its nice to have another re-build on this early (1997?) Tamiya on-road shaft-driven 4wd platform…


Looks to have at least with a half dozen Hopped-up parts from Tamiya 🙂
So far, here are the OP’s I have noticed
53418 TL-01 Universal shaft (2pc.)


53346 TL-01/M03 quick release battery holder
53342 TL-01 speed-tuned gear set
53323 TL-01 carbon propeller shaft
53322 TL-01 hollow carbon gear shaft
53303 TL-01 adjustable upper arm set
53301 TL-01 stainless steel suspension shaft set
53300 TL-01 turnbuckle tie-rod set
53292 TL-01 ball bearing set
53280 TA03 super low friction damper set (4pc.)
53267 TA03 ball differential
53163 On-road tuned spring set
53159 4mm anodized aluminum flanged lock nuts (blue)


—————
TL-01 vs. TL-01LA ???
Tamiya TL-01LA Chassis
1/10 Scale Electric Touring Car Chassis:
Basically the difference between the TL-01 and the TL-01LA is that the it has Long Arm suspension (LA) that vastly improves the cars handling when cornering.
The TL-01LA monocoque frame chassis is shaft driven four wheel drive, with orbital gear differentials front and rear. The suspension is four wheel independent double wishbone with plastic Coil Spring over Friction shock absorbers.
The stick battery is positioned in the middle, across the width of the chassis. Steering is via two plastic track rods of fixed length. These can be replaced with appropriate length turnbuckles if desired, to allow some toe-in adjustment for improved cornering.
The kit comes with Nylon/plastic and sintered brass bush type bearings that after a short while, when dust and grit get into them, actually wear into the metal drive shafts – if you are building this kit to race seriously these should be replaced by steel, rubber shielded ball bearings.
To get the best from the Tamiya TL-01LA Chassis, it needs to be fine tuned to hug the corners at high speed, without slipping off the track and accelerate smoothly under control. Small adjustments can make a Big difference and our simple to understand, step by step procedure, will guide you to the best Set-up for your driving style.
Thought of documenting this particular tamiya OP(option part) for reference purposes …

Currently re-building a hopped-up TL-01 chassis with drift set-up so might as well study this “speed-tuned” option part if it would really improve top speeds…


[taken from RCmart site…price-$7.50]
Usable With: TL-01 Chassis Cars (Except TL-01B, Stadium Raider)
*It can be used with kit-supplied pinion gear and provides higher maximum speed.
“Use this Speed-tuned gear set to obtain much higher top speed with your TL-01 or HBX car, than with the standard gear set. With the stock counter gear and a 19T pinion you get a ratio of 7.96 – with this speed tuned gear set the ratio is 5.95 – thats 33% more top speed and easily noticeable! You can go to a ratio of 4.92 if you use a 23T pinion – more than 60% more top speed than with the stock pinion and counter gear. Great for speed runs and large circuits. Only downside is of course that your batteries will be drained faster – but you’re having so much more fun that you are still smiling while you are charging your batteries :-)”
By Jesper Munk Nielsen Date Added: Friday 03 July, 2009
——

[Taken from towerhobbies site]…price-$10.99
This is the optional Speed Tuned Gear Set for the Tamiya TL-01.
| FEATURES |
Black plastic construction.
Lowers gearbox ratio.
| INCLUDES |
Two speed tuned gears.
Instruction sheet.
| REQUIREMENTS |
Assembly on vehicle.
Replacing stock plastic gears with included gears.
| SPECIFICATIONS |
47T Super Gear
29T Counter Gear.
| COMMENTS |
Pinion Gear Normal Ratio Speed-tuned ratio
19T 7.96 5.95
21T 7.20 5.39
23T 6.57 4.92
pjm 8/10/02
ir/kh
************
Tamiya TL01 Speed Tuned gears inquiry thread (from rcracechat.com):
Can anyone Please tell me if the Tamiya TL01 Speed Tuned gears make any diffrence to the speed of your car. If they do which gears is it you replace as the tamiya pack only containes 2 gears and there are two gearboxs on the TL-01 chassis. [06-12-2004 07:13 AM]
>Hi,
The Speed tuned gears gives you a higher top end but less accelaration.
The gear ratios are provided with the set.
You only use them on the rear set, the front stays standard.
To be honest when I did it to my old TL01 I didn’t notice much difference.
My advice would be to save your money and put it towards a decent motor.
———
“Thank you Fausto for the info. i have a 19 turn motor in and have a 17 turn motor i was going to try in the chassis in its place was just thinking i may get that little bit more speed with the new gear set, but if you say it do not make that much diffrence may just leave it as it is. “
———
Well i done it speed-tuned gears, a 21 tooth pinion gear and a 17 turn motor and according to a little bit of free software for my computer called RC Car GEAR RATIO CALCULATOR my TL-01 chassis now pulls 40.93mph if i put a 23 tooth pinion on it will put the speed up to 44.83mph. To be honest do not know if this is true speed but on road testing shows the car to be much faster,also uprated the shockers and put on a stabilizer set. will see how car performs at the next race meet.
Download: RC Car GEAR RATIO CALCULATOR here:
http://www.waits.net/public/rcgears/
This is a very good charger for NICAD and NIMH battery packs. It also has a charging port for a glowplug igniter (very useful if you run nitro as well). Not really a vintage dinosaur piece compared to the multi cell type smart chargers nowadays (like the Elan), it still can hold its own ground in terms of charging capability.

Here are the specs (taken from the net)…
An extremely high spec charger
NiCad and NiMH Capable
Wide Voltage Charging (glow igniter), 4-24 Cell)
Delta Peak cut off with automatic trickle
DC to DC Charging with Booster Circuit
Built in glow igniter peak charging circuit
Wide Input Voltage Range 9-13.9 Volt
MOS-FET Drive Control
Leads and alligator clips for power supply; two alligator clip leads for charging the battery
If the batteries can not be charged with the alligator clip connectors this charger will require battery connectors and charge leads. The charge outputs can accept banana plugs.
———–
“Hitec CG330 peak charger is a very versatile charger, incorporating a unique glow igniter battery charging feature and a “boosted charging method” that charges up to 24 cells (28.8 Volts) from a 12 Volt source.”


July 22, 2017 – Charging a 7-cell sub-C 1600 “Atlantis”/Echigoya Japan battery pack


Used a pair of small alligator clips to connect charger output to the mini Tamiya connector of the battery pack. About 1hour charging time at A=1800mah setting.
(Photos for now…) This is Tamiya kit # 58498 and is the 5th truck bearing the “Blackfoot” name and the “III” due to the reason that it is the 3rd kit that has the original Ford Raptor F-150 “stepside” body. The kit also inlcudes a driver figure that comes in stock black plastic that you have to paint to make it look realistic…

 Finished building this kit a fortnight ago, already installed the electronics and tested with my hsp bronto pro wheels/tires to preserve the orig stock tires 🙂 Actual build below …
 Blackfoot chronolgy 1. The original Blackfoot, (item no. 58058; released 1986)

2. Super Blackfoot, (58110; December 1992)
3. King Blackfoot and (58192; released July 1997)
4. The Blackfoot Extreme (58312; released December 2003)
5. Blackfoot III (58498; released August 2011)

 The kit came with a “bonus parts” bag that contained 8 pcs of 11x5x4mm sealed ball bearings – took down the assembled gearbox to change all plastic bushings into the included steal bearings … ================
Rear tranny/gearbox assembly


—————–
Front frame/suspension assembly


Photos for now 🙂


Here’s the SHORT version…

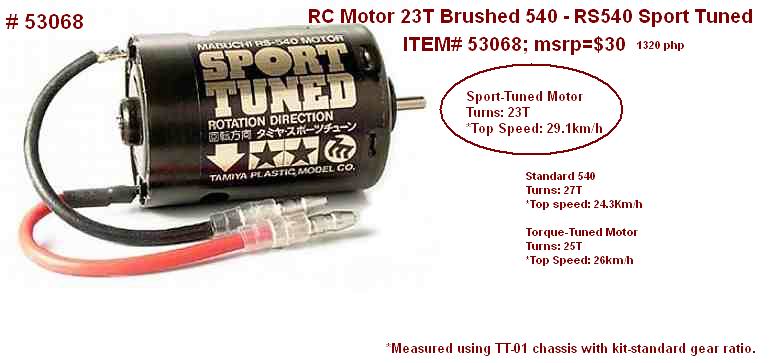
Decided to put together a quick reference for these two “modified” (slightly) 540-sized motors from Tamiya. RS540 Sport Tuned Motor features performance enhancements above stock silver can motors for faster acceleration and higher top speeds!
Tamiya 540 motor comparison
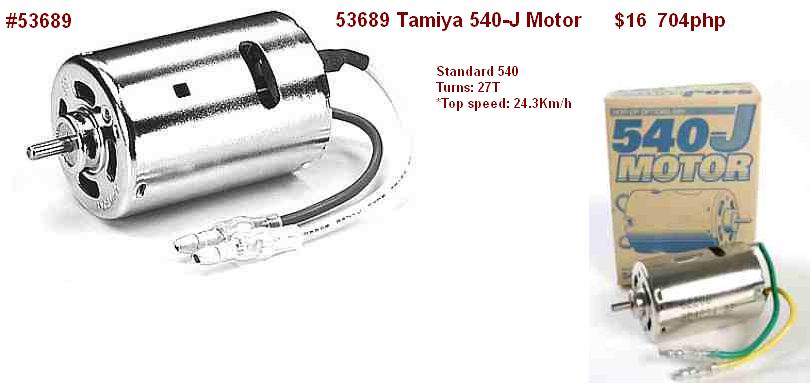
Standard 540
Turns: 27T
*Top speed: 24.3Km/h
Torque-Tuned Motor
Turns: 25T
*Top Speed: 26km/h
Sport-Tuned Motor
Turns: 23T
*Top Speed: 29.1km/h
*Measured using TT-01 chassis with kit-standard gear ratio.
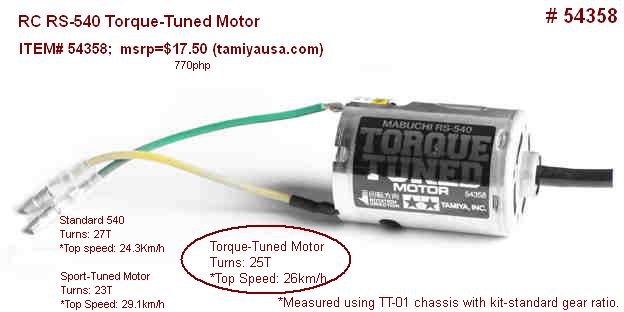
(above pic)Tamiya has developed this new Torque-Tuned motor, which offers performance that is between that of a standard Type 540 motor and Item 53068 Sport-Tuned Motor. Compared to a standard Type 540 motor, it offers a higher top speed and improved acceleration when used with a RC car model’s standard gear ratios.
Actual can dimensions are 50mm long x 35.5mm diameter w/ 3mm shafting.
——————-
For reference, here’s the
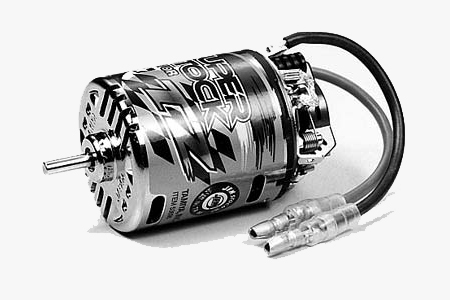
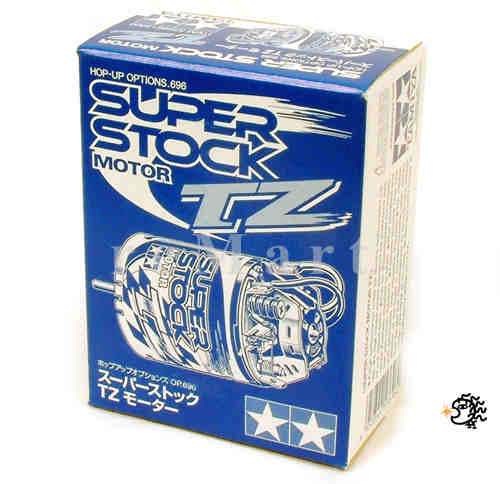
Tamiya (#53696) Super Stock Motor TZ
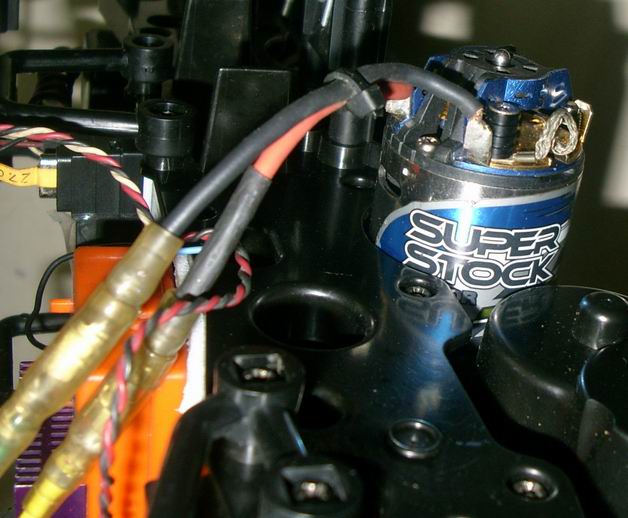
- A high performance motor for electric radio control car use.
- A high torque motor is designed for endurance race or low speed track.
- Can be disassembled for maintenance. Features standard brushed.
- Blue anodized end bell with brush dampers.
- Features terminal heat sink and detachable chip capacitor.
[Caution] The rotation direction of the motor is counter-clockwise when viewed from the gear end.Specification:
- No. of turn: 23 turns
- Proper voltage range: 7.2V
- RPM at no load: 26,500rpm (7.2V)
- Best efficiency: 78%
- Torque at best efficiency: 500gf.cm (7.2V)ROTATION DIRECTION
make sure the rotation direction of the motor is correct. The rotation direction of the motor is counter-clockwise when viewed from the pinion gear end. Running the motor in the opposite direction will result in reduced performance.REPLACING BRUSHES
- Check brushes after use 10-15 full battery packs.
CAUTION WITH RUNNING THE MOTOR
- Make sure to replace plastic bearings with ball bearings. Plastic bearings cannot endure motor rotation.
- Continuous running will damage the motor. Let the motor cool after each full battery run.
- Never overload the motor. Make sure that all the gears and rotating parts move smoothly to prevent motor burn out.
- Never cover the motor. Covering will hinder heat dissipation resulting in damage.
- If motor gets damaged or over-heats, performance will deteriorate.
- Periodically disassemble, clean and maintain motor after running it.
- Use only genuine Tamiya spare parts.
- Communtator Cleaning Brush Set (53486) is recommended for cleaning. Replace the brush on one side (+ or -) and run the motor without load.
Retail from $27-44$.
—————
Other motors of interest…
Tamiya 53477 (OP-477)
Super Stock Motor Type T (23T)

Above motor currently installed in a TL-01 chassis with an LRP IPC-sport brushed ESC.

Photos of the makeover this past week… 


This is an original Mugen (Made by Mugen Engineering Co., Ltd of Japan) 1/8-scale rc nitro buggy that was converted to an electric-powered unit (brushed set-up). Installed motor is a big brushed Traxxas TITAN 775 (#KA1161) with a module 1.0, 13-tooth pinion gear. ESC is a dual battery, “dual motor” (brushed), GT – 14.4volt made by HPI Racing (#309-002). To aid in heat dissipation, a mini fan was directly glued onto the surface heatsink. Although the esc has 2 pairs of terminals for 2 motors, the single huge motor is wired directly to “both” pairs – so the terminal pairing is wired in parallel (+ & + soldered to + motor tab and – & – soldered to – motor tab).
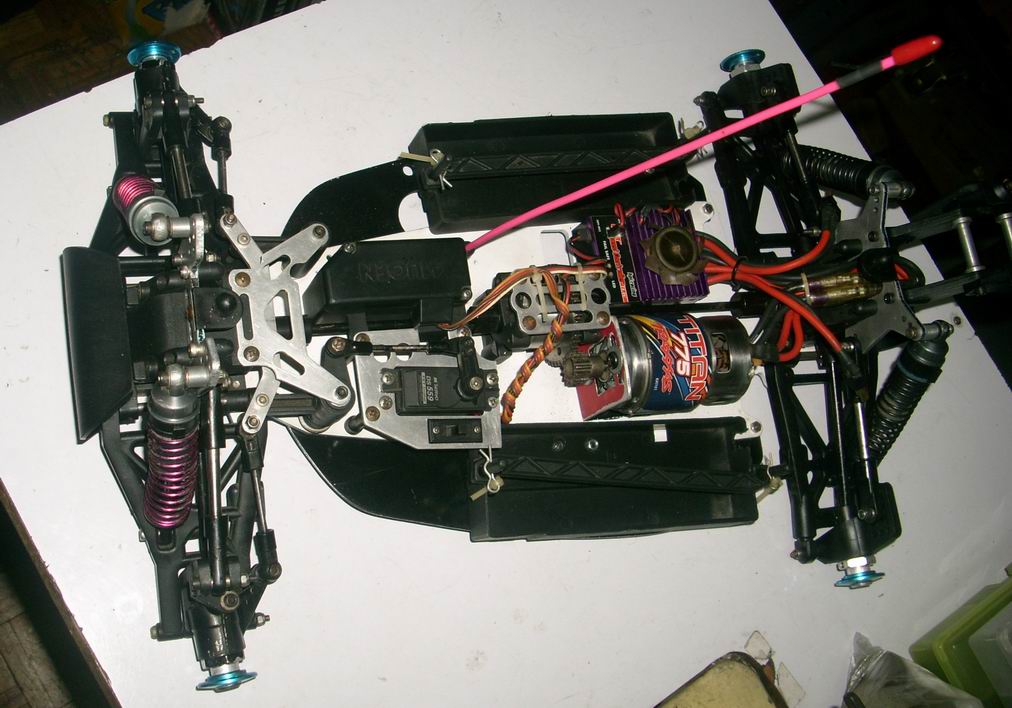
Color scheme for the wheels and tires has that retro-look of the 80’s pastel yellow and blue – personally I like it! Those cross and dash studs on the tires look very similar to the kyosho ones of the same “era”. Even the shell has that nostalgic paint scheme and shape.

Its very nice to finally own a piece of Mugen r/c history :-). Speed runs on 2 1200mah nicad packs is quite laid back, I suppose putting on a pair of nimh would only bump it up a bit (still to be confirmed) and with a higher mah rating would only increase run time. On 2 2S lipo packs, the buggy comes to life, if you know what I mean. And it looks like the HPI racing GT dual motor ESC is capable of handling a pair of 2s lipos (similar to the Traxxas EVX-1 14.4V esc).


Below are photos of the “re-build”.


————————–
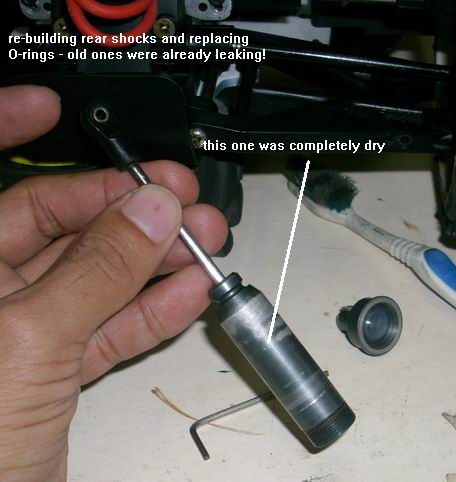
Re-building rear damper set due to worn-out O-rings …leaking shock oil, very bouncy rear and kept on bottoming out on bumps.


———————————–
Sept. 13, 2014 – It’s been a week now since I had this buggy and after re-building the rear shocks, it handles a lot better now – this would definitely give my Turnigy 2s 5k lipo pair some workout soon 🙂


And oh, I outfitted it with a set of wheels and tires from another buggy, wanted to “preserve” the original ones with the retro-color of yellow and blue.
